Now let us see how to configure Fluent Automation in Visual Studio.
Step 1: Open Visual Studio
Visual Studio is a comprehensive collection of developer tools and services to help you create apps for the Microsoft platform and beyond.
Step 2: Create a new “Class Library” project:
File → New → Project → Select “Class Library”
Step 3: Give the location where want to store the Project in Location field
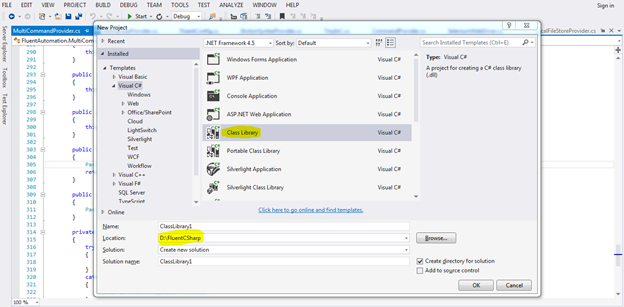
Step 4: It will automatically create a Project with the name “ClassLibrary1” and “Class1.cs” file in it. If want can change the name.
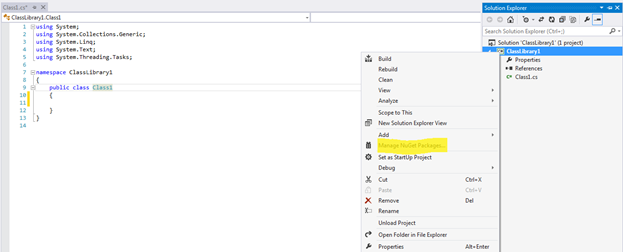
Step 5: Now Install the Fluent Automation NuGet packages to the “ClassLibrary1” Project.
Right Click On ClassLibrary1→ Manage NuGet Packages…
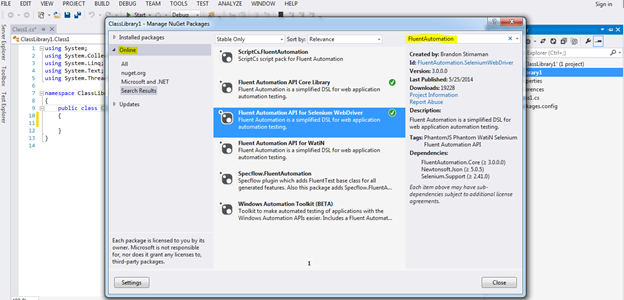
Step 6: Click on Online option in the left side of the NuGet Packages Window.
Step 7: Search the FluentAutomation in the Search Box located on the right side of the NuGet Packages Window.
Step 8: Install “Fluent Automation API Core Library” and “Fluent Automation API for Selenium WebDriver” packages
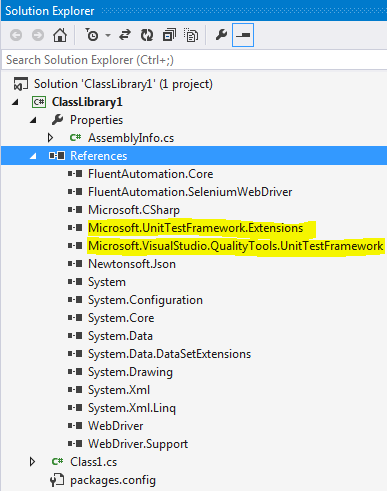
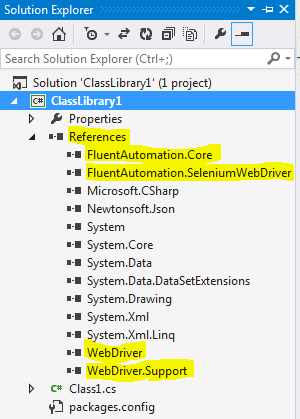
Step 9: Now can find the installed dll s in the Project References section
Configure MS Test framework:
Step 1: Install the MSTest NuGet packages to the “ClassLibrary1” Project.
Right Click On ClassLibrary1→ Manage NuGet Packages…
Step 2: Click on Online option in the left side of the NuGet Packages Window.
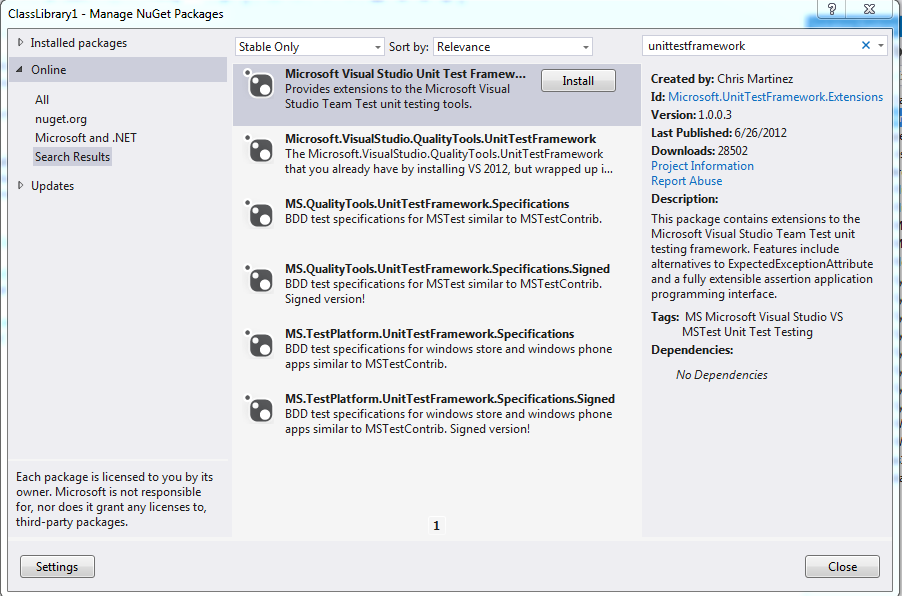
Step 3: Search the UnitTestFramework in the Search Box located on the right side of the NuGet Packages Window.
Step 4: Install “Microsoft Visual Studio Unit Test Framework Extensions”
Step 5: Now can find the installed dlls in the Project References section
Step 6: Now can start write the programs using Fluent Automation. Before this, need to inherit the FluentTest class.
Add new comment